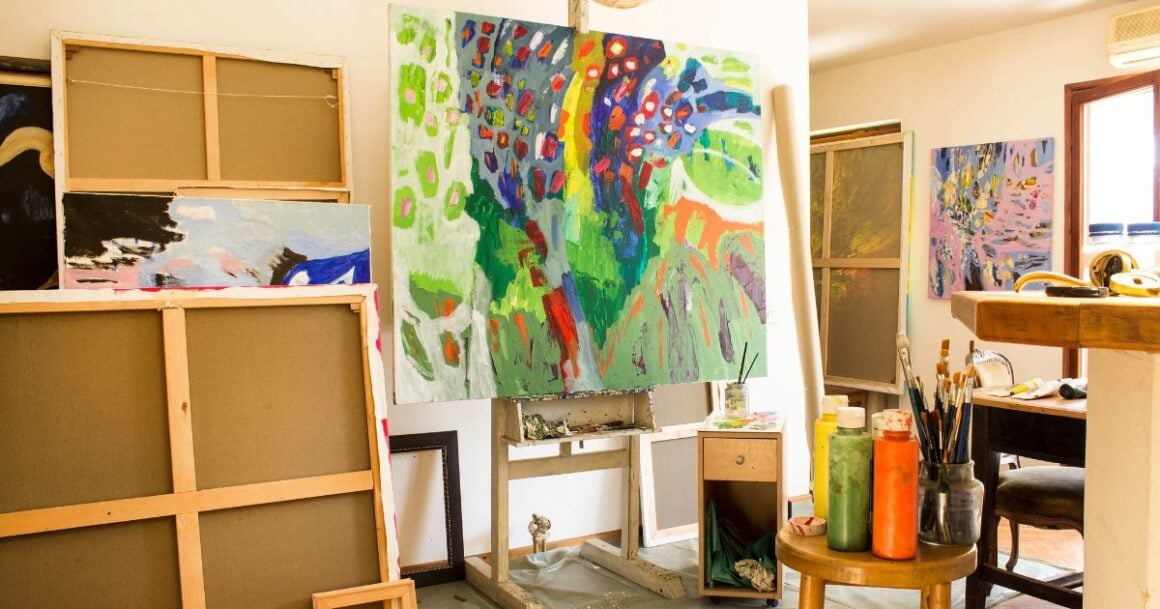
How to Set Up a Home Art Studio in 17 Smart Steps
Learning how to set up a home art studio might feel overwhelming, but I promise it’s easier than you think. Maybe you’re tired of clearing off the kitchen table every time inspiration strikes, or perhaps you’re ready to graduate from your “art supplies scattered across three different rooms” phase (no judgment here – we’ve all been there!).
The truth is, you don’t need a sprawling loft or a Pinterest-perfect converted barn. What you do need is a thoughtful approach to making the most of whatever space you have – whether that’s a walk-in closet, a section of your living room, or even just a dedicated corner that’s truly yours.
Today, I’m sharing everything I’ve learned about creating a home art studio that actually works for your life, your budget, and your creative dreams.
This post may contain affiliate links. Click to visit policies and disclosures
Why a Home Art Studio is a Game-Changer for Artists
For me, having a dedicated space to do my art has been a game changer.
It’s more than just a room—it’s a personal retreat where creativity thrives and distractions fade away. Setting up a home art studio is a powerful step for any artist, whether you’re a full-time professional or simply someone who creates for joy.
The moment you carve out a space that’s just for your art, your mindset shifts—and so does your productivity.
Here’s why a home studio can truly transform your creative journey:
- Consistent workflow: Say goodbye to setting up and packing away every time you want to create. Your tools are ready when you are.
- Creative freedom: Paint at midnight, sculpt at dawn, or sketch while sipping coffee—your schedule, your rules.
- Cost-effective solution: Renting studio space can be expensive. A home setup saves you money while offering daily access.
- A personal sanctuary: Beyond being a workspace, your studio becomes a haven—a calming place where stress melts away as soon as you pick up your brush or pencil.
Whether it’s a full room or a cozy corner, your home studio is a reflection of your creative spirit—and once you have it, you’ll wonder how you ever worked without it.

How to Set up a Home Art Studio:
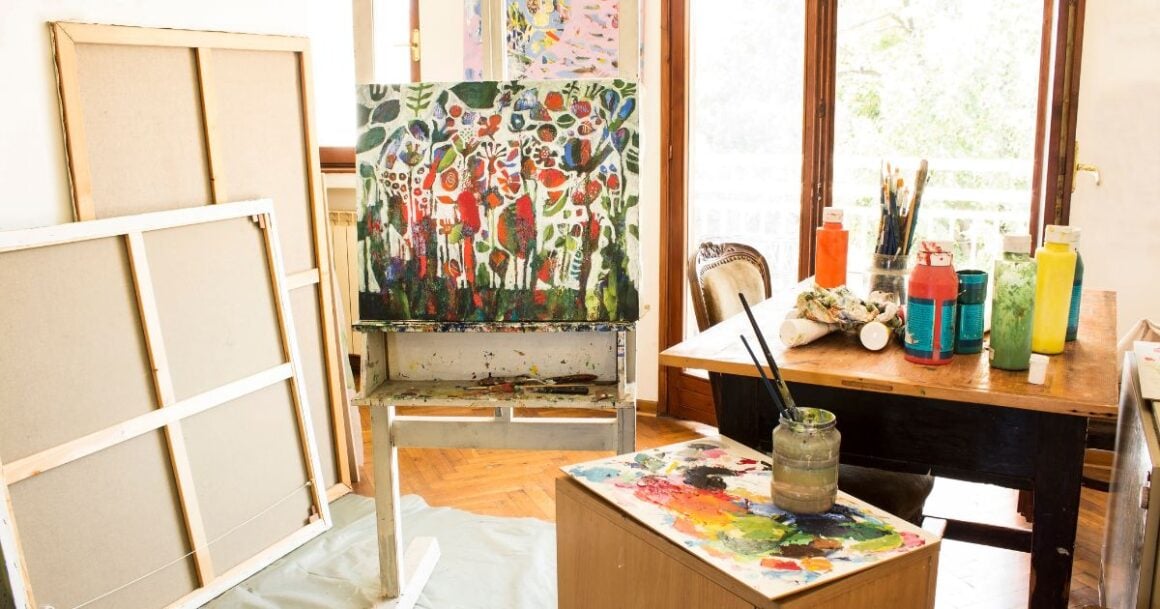
Choosing the Perfect Location in Your Home
Selecting the right spot for your home art studio is one of the most important—and exciting—parts of the setup process.
The good news? You don’t need a huge room or a fancy renovation to get started. With a bit of creativity and organization, even the smallest corner of your home can be transformed into a functional and inspiring studio space.
Think Outside the Box: Small Spaces Can Work Wonders
If you’re short on space, consider these often-overlooked areas:
- Pantry or walk-in closet: These spaces can be transformed into cozy, efficient art nooks. With a small desk, good lighting, and wall-mounted storage, you can create a quiet sanctuary hidden in plain sight.
- Under-stair storage: Convert this awkward space into a mini-studio with a fold-out table and pegboards for supplies.
- Hallway alcove or landing: Ideal for quick sketches or craft projects—just add a compact cart or folding table.
Popular Options for Larger Setups
If you have a bit more room to work with, here are some common areas artists love:
- Spare bedroom or attic: Perfect for privacy and long-term projects. You can leave your work-in-progress undisturbed.
- Garage or basement: These areas are great for messy mediums like sculpture, woodworking, or large-scale painting.
- Living room corner: A well-organized art station can seamlessly blend into shared spaces with stylish storage and minimalist tools.
Budgeting for Your Art Studio Setup Without Breaking the Bank
Setting up a home art studio doesn’t have to drain your wallet.
You can build a beautiful, functional, creative space on a surprisingly low budget—if you’re smart about where and how you spend.
Clever Ways to Save on Your Art Studio Setup
Here are some smart and simple ways to create your dream studio for less:
- Repurpose what you already have: Turn an old kitchen table into your art desk or transform unused cabinets into storage for brushes and supplies.
- Thrift store treasures: Check local secondhand shops, flea markets, or online marketplaces for affordable easels, rolling carts, shelving, and chairs.
- DIY storage solutions: Get crafty with mason jars, plastic bins, wooden crates, or even shoe boxes. Label everything and stack vertically to save space.
Essential Furniture and Workspace Layout
A well-designed art studio isn’t about cramming in fancy furniture—it’s about creating a space that lets your creativity flow without interruption.
The goal is simple: everything should serve your process, not slow it down.
When your workspace is functional and clutter-free, you’ll find it easier to focus, stay inspired, and actually enjoy spending time in your studio.
Must-Have Furniture Pieces:
- Sturdy Desk, table, or Easel: Your main work surface should match your medium. Painters may need a tilt-adjustable easel; illustrators and digital artists often prefer a flat, spacious desk.
Make sure it’s large enough for your tools and projects without feeling cramped. Bonus if it’s easy to clean! - Comfortable, Adjustable Chair: Long sessions demand good posture. An ergonomic chair with lumbar support and height adjustability can save your back and neck.
Look for chairs with breathable fabric and smooth wheels if you move around a lot. - Shelving and Drawers: Vertical shelving keeps materials organized without eating up floor space. Use drawers for smaller tools, sketchbooks, and supplies you reach for often.
Add open shelves for displaying inspiring objects or storing bulkier items like portfolios and boxes.
Smart Studio Layout Tips:
- Stay Within Reach: Position your most-used tools—brushes, pens, sketchpads, palettes—within arm’s length. This saves time and reduces unnecessary movement, especially during creative flow.
- Avoid Crowding: Leave enough room around your workspace to move freely. Overloaded desks lead to clutter, which can stress you out and distract you from your art.
- Use Zoning: Even in small spaces, divide your studio into functional areas—like a primary work zone, a storage zone, and a drying/display zone. This helps maintain order and keeps you from constantly rearranging things.
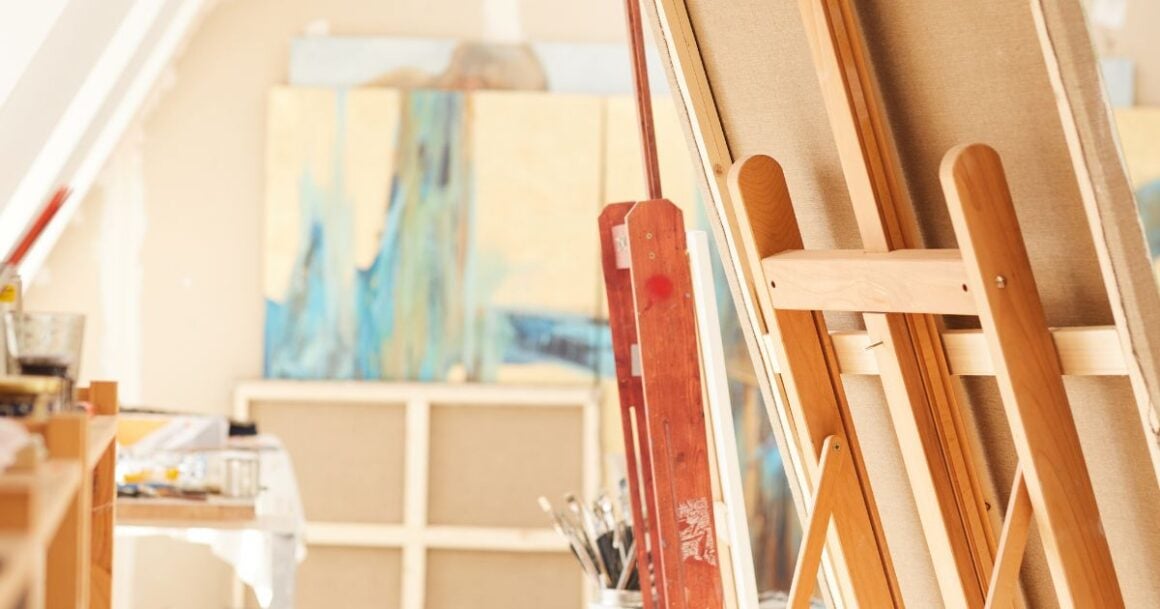
Types of Easels: Choosing the Right One for Your Home Studio
Not all easels are created equal. The type of easel you choose can dramatically impact your comfort, workflow, and even the style of your art. Whether you’re a plein air painter or a studio-based portrait artist, there’s an easel tailored to your needs.
Let’s break down the most common types of easels to help you find your perfect match for your home art studio
1. H-Frame Easel
This is a studio staple. Shaped like an “H” from the front, H-frame easels are sturdy and ideal for large canvases.
H-Frame easels offer strong vertical support and often feature adjustable height and angle options. They’re a bit heavier, making them less portable, but their stability is unmatched.
Best for: Studio painters working with large or heavy canvases.
A-Frame Easel (Lyre Easel)
These are shaped like an “A” and typically take up less floor space than H-frames. A-frame easels are easy to fold and store, making them ideal for smaller studios. However, they may not hold up as well under the weight of larger canvases.
Best for: Beginners, small spaces, or artists working with medium-sized canvases.
Tabletop Easel
Perfect for artists with limited space, tabletop easels sit on a desk or table and are usually lightweight and portable. They’re great for small-scale work and quick studies, but not suited for anything too large or heavy.
Best for: Small projects, students, or hobbyists.
French Easel
A favorite for plein air painters, the French easel is a portable box-style easel with collapsible legs. It includes compartments for paints, brushes, and other supplies, making it an all-in-one solution for artists on the go.
Best for: Outdoor painting, traveling artists, or anyone who loves painting on location.
Wall-Mounted Easel
Mounted directly onto a wall, the Wall easel is great for maximizing floor space. It’s ideal for artists who work on large canvases and need a permanent setup.
These can be custom-built or purchased as kits.
Best for: Studio artists with limited floor space but ample wall area.
Display Easel
These are lightweight, foldable stands used primarily for showcasing finished works rather than creating them. Display easels are not built for stability or working on, but they’re great for art shows or exhibitions.
Best for: Displaying art in studios, galleries, or booths.
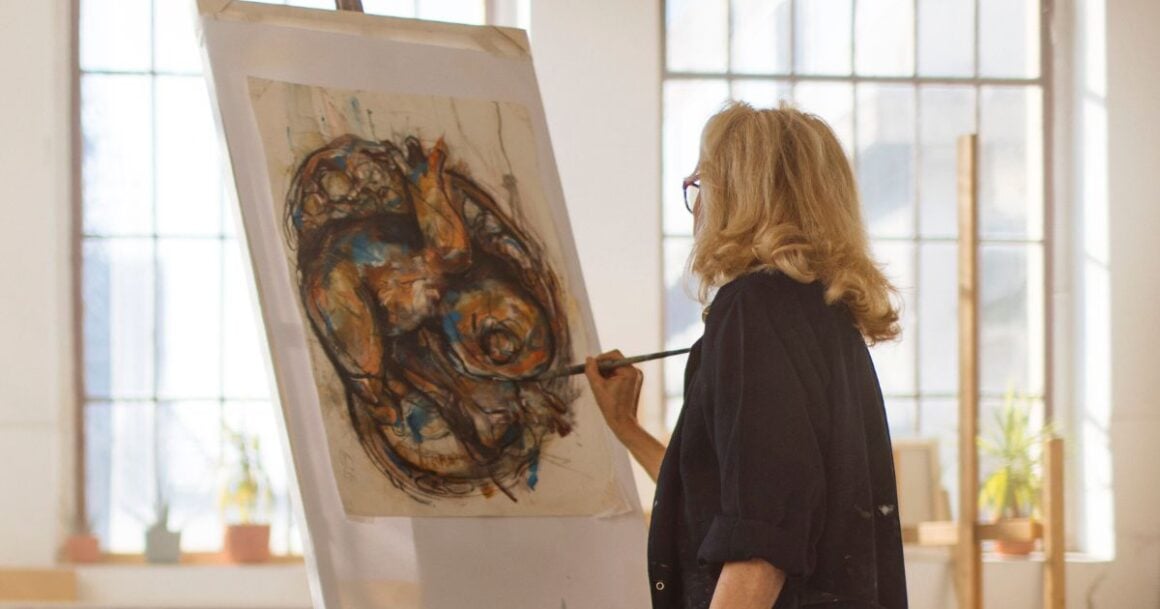
Lighting: Set the Stage for Your Best Work
The way you light your studio directly affects how you see colors, textures, and forms, which in turn influences every creative decision you make.
A poorly lit space can make colors appear dull, cast misleading shadows, or even cause eye strain.
On the flip side, the right lighting setup can breathe life into your art and keep you energized throughout your creative sessions.
Best Lighting Practices for Setting Up a Home Art Studio
Natural light is your best friend. If you can, set up near a north-facing window—it offers the most consistent, indirect light throughout the day without harsh glare.
When natural light isn’t available, opt for daylight-balanced LED bulbs (5000–6500K) to mimic actual daylight and ensure accurate color perception.
You can also combine ambient (overhead) lighting and focused task lighting.
Overhead lights provide general illumination, while adjustable lamps or directional spotlights help you focus on intricate details, such as cutting, gluing, or shaping materials.
Go for adjustable gooseneck lamps or clamp-on lights for flexibility.

Flooring Tips for Setting Up a Home Art Studio
When setting up a home art studio, don’t underestimate the importance of flooring.
The right floor can handle spills, support your workflow, and make cleanup easier after creative sessions.
Art is messy. Spills happen. Paint drips, ink splatters, clay crumbles—your flooring will face it all.
So, your goal is to pick something that can handle the chaos and clean up without a fuss.
Protective Add-ons for home art studio flooring
- Plastic Floor Mats: Place them under your easel, worktable, or chair. They catch spills, prevent scuffs, and make cleanup a breeze. Choose clear mats if you don’t want to hide your floor’s design.
- Drop Cloths or Painter’s Tarps: These are your go-to for quick, budget-friendly coverage during particularly messy projects.
Use canvas drop cloths for reusability, or opt for disposable options for heavy-duty, one-time use. - Interlocking Foam Mats: Not only do these add a pop of color, but they also provide comfort when standing. They’re especially great for artists working on long, detail-intensive projects.
Organizing Art Supplies
Here’s the thing about art supply organization: it’s not about having Instagram-worthy pegboards (though they’re lovely).
It’s about creating systems that work when you’re in full creative mode. Because when inspiration strikes at 10 PM on a Tuesday, you want to grab your supplies and go, not play hide-and-seek with your art materials.
The secret is building organization around how you actually create, not how you think you should create.
Some artists thrive with everything visible and within arm’s reach. Others need clean, minimal spaces with supplies tucked away.
There’s no wrong way—just your way.
Start by asking yourself: What supplies do you reach for most often? Those should be the easiest to access.
Everything else can live a little further away, but still have a designated home where you’ll actually remember to put it back.

Group Materials by Type and Frequency of Use
The golden rule of studio organization? Like with like.
Start by grouping your supplies based on medium: acrylics in one bin, oils in another, watercolor pans together, and so on.
Brushes, markers, charcoal sticks, and palette knives should each have their own designated home.
But go deeper—within those categories, sort by frequency of use.
Keep your go-to items within arm’s reach, and stash the less-used supplies in higher or harder-to-reach places. This approach keeps your workspace efficient and prevents everyday items from getting buried in clutter.
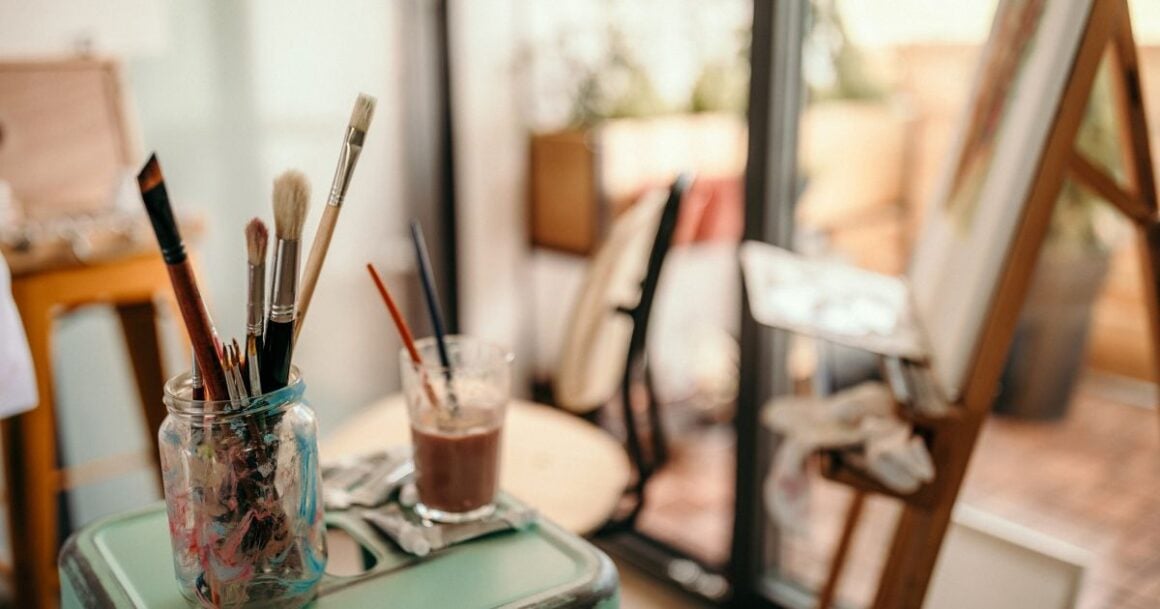
Use Clear Bins, Labeled Containers, and Drawer Organizers
Visibility is everything. Clear containers or glass jars let you see exactly what you have, reducing overbuying and waste.
Labels are your best friend—don’t just guess which bin has the metallic markers or which drawer holds the masking fluid. Invest in a label maker or use sticky notes and tape if you’re on a budget.
Drawer organizers can transform a chaotic drawer of brushes and pencils into a tidy toolkit.
Mason jars, recycled cans, and divided trays are also great for holding upright tools like pens, scissors, and rulers.
Pro tip: Use stackable bins to maximize shelf space. Group them by theme—such as painting, drawing, and printmaking—and label accordingly.
Use Vertical Storage in Your Home Art. Studio
If you’re working with a compact space, think vertically. Wall space is often overlooked, but it’s a goldmine for organization.
- Pegboards are a dream come true. Mount one above your worktable to hang scissors, rulers, paintbrushes, or even tiny shelves for paints and mediums.
- Wall rails with hanging baskets (like IKEA’s FINTORP system) are excellent for storing tubes, jars, and smaller tools.
- Floating shelves are ideal for storing sketchbooks, canvases, or displaying items.
- Clipboards or magnetic strips on the wall can hold inspiration images or frequently used notes and references.
Create a Mobile Art Cart for Flexibility
A rolling art cart is like a portable mini-studio. Load it up with your daily essentials—brushes, palettes, water containers, towels, and current project supplies.
When you’re done, roll it to the side.
It’s especially handy if your studio is in a shared or multi-purpose space, such as a living room or kitchen nook.
Store Canvases, Papers, and Sketchbooks Properly
Large flat items like canvases and paper pads need special storage solutions:
- Use slotted racks or vertical bins to store canvases upright and avoid warping.
- For paper and sketches, flat drawers or portfolio cases work best to keep them from curling or getting damaged.
- Consider an accordion file for organizing small sketches, ideas, or reference images.
Be sure to protect works in progress with clean sheets of paper or plastic sleeves, especially if you’re working on multiple pieces at once.
Clean As You Go—But Keep a “Creative Mess Zone”
Yes, staying organized is great—but don’t let it kill your vibe. I think that sometimes, a little chaos sparks genius.
I give myself a “creative mess zone” where paints are flying, collage papers are everywhere, and brushes are soaking in buckets.
That said, I suggest developing the habit of resetting your studio at the end of each session.
Wipe your table, clean your brushes, and return tools to their home.
This ritual not only preserves your supplies but helps your brain shift gears, so you start your next session with clarity.
Related Art & Craft Articles
- 12 Steps to Overcoming Imposter Syndrome
- Embrace The Hygge Lifestyle for Cozy Living
- Cozy Fall Nesting Idea for Empty Nesters
- Overcoming Perfectionism As An Artist
- Unlock Creative Flow: Enhance Your Artistic Process
- Overcome a Creative Block
- The Ultimate Guide to Adult Coloring
- Creative Art Hobbies for Women
- Make A Creative Prompt Jar For Artists
- Super Fun Christian Christmas Crafts for Kids
- How to Make Pinecone Bird Feeders
FAQs: How to Set Up a Home Art Studio
What is the minimum space needed for a home art studio?
You can start with as little as a 5×5 ft corner if well-organized. Use vertical storage and multifunctional furniture to maximize utility.
How do I choose the best lighting for my studio?
Natural light is best. If that’s not available, use daylight-balanced LED bulbs to accurately represent colors.
What supplies should I prioritize when starting out?
Essentials include a sturdy table, adjustable chair, storage units, and quality lighting. Start small and expand as you go.
Can I set up a studio in a rental apartment?
Absolutely! Choose portable, non-permanent solutions, such as foldable furniture, rolling carts, and adhesive wall hooks.
How do I keep my studio organized?
Use clear containers, label everything, and maintain a simple cleanup routine after each session.
Is it necessary to have ventilation in an art studio?
Yes, especially if you’re using oil paints, varnishes, or solvents. A fan or open window can make a big difference.
Resources for setting up a home art studio:
Guides & Articles
- Your DIY Guide to Designing a Home Art Studio
Detailed step-by-step guide to transforming any spare room into a functional art studio. - Kamakru – Expert Tips for Creating the Ultimate Home Art Studio
Tips from professional artists. Learn about ventilation, lighting, zoning, and more. - EvolveArtist – The Ultimate Guide to Set Up Your Home Art Studio
Covers everything from space planning to lighting, flooring, easels, and storage ideas. - Winsor & Newton – Setting Up an Artist’s Studio
A classic resource addressing safety, space selection, and essential kit. - DoodlersAnonymous – The Ultimate Guide to Setting Up an Art Studio at Home
A beautifully designed resource on workspace layout, supply organization, and inspirational decor.
Conclusion: How to Set Up a Home Art Studio
Creating a home art studio isn’t about having the perfect setup from day one—it’s about building a space that fuels your creativity and fits your lifestyle.
Whether you’re a painter, illustrator, or mixed-media maker, the key is to make intentional choices that support how you work: smart storage, good lighting, comfortable furniture, and materials that are easy to maintain.
Your home art studio doesn’t have to be big or fancy—it just needs to be yours.
Start with what you have, grow over time, and keep refining your space as your artistic needs evolve.
With the right setup, even a small corner can become a powerful place of focus, freedom, and inspiration.
Let your studio be more than just a workspace—make it a creative sanctuary where your ideas can come to life.
Good Luck and Have fun!
XO, Christine

I’ve been keeping it real since 1963. 😊
I’m a child of God, devoted wife, proud mama and grandma, full-time creative, domestic engineer, and passionate self-care enthusiast.
I’m purpose-driven and do my best to live each day with intention—whether shopping for treasures, painting in my art studio, digging in the garden, or cooking up something yummy for my family.
I’m always up for a good chat and love collaborating with fellow creatives and brands.
Let’s connect—don’t be shy!